My vacation is coming to a close, but I have spent this week on something somewhat productive. I decided to re do our bedroom. We started saving up for a home of our own and from what I budgeted we were supposed to be ready this September. Unfortunately I miscalculated my beau's temporary raise into the budget and realized we wont be financially ready until January-February 2012. I'm pretty sure my redecorating obsession has stemmed from this. I'm trying to make our nest a bit more cozy to make it easier knowing we are staying where we are for so much longer.
Onto some good DIY!
Lately I have felt really inspired by Robins Egg Blue. I decided to take the plunge and paint the bedroom entirely in that color! I am a very beige person so this was a big decision for me. I'm really glad I did it while we are renting because although I am pleased with the results, I'm still not sure if it I am madly in love with it. I also decided to try my hand at stenciling. There are many other amazing DIY blogs out there where you can see lots of great examples of stenciling. Again, I am glad I tried this technique while renting, it's been great practice for me.
Here's the before pictures of my bedroom,
And the after pictures,
I moved the bed in front of the window. I love how much light white curtains bring in.
This is a close up of the little shelf, it holds my milk glass vase collection.
An awkward look of the stenciled wall, It was impossible to fit it all in one picture!
I swapped out our old nightstands for this cute cabinet. My Great Grandmother built this cabinet decades ago. I inherited it awhile back was really excited to be able to put it to good use. I think eventually I will give it a fresh coat of paint and new knobs. Another DIY project perhaps!
This is the far wall, kind of bland still! I'm thinking about what I want for the art in this space. I'm pretty sure the pictures up now are temporary. Also I apologize if the pictures look grainy or pixelly I'm not really sure why this happened. I have an amazing camera yet I'm pretty awful at taking photos of anything that isn't close up. Hopefully my photo's somewhat conveyed how cute the stenciling came out, and perhaps encourage you to give stenciling a try! I will put up a post in a few days detailing my stenciling experience.
Overall I'm happy with the space I created. I didn't expect it to turn out quite as bright, or quite as feminine (my beau hasn't yet seen the completed space, not sure if he's going to love it or hate it!). I do think sprucing up the space was a fun experience for me and a great learning lesson!
Loves!
Am
Thursday, March 31, 2011
Saturday, March 26, 2011
DIY Pillow!
My inspiration came from Pottery Barn's Textured Linen Pillow Covers. I love the clean design and wooden buttons.
Now take your front piece and back piece and pin together.
Stitch along the edges. Leave a small amount open at the bottom for right siding and stuffing.
Using the open pocket right side the pillow case.
Stitch your button on now.
Stuff your pillow!
Now pin the hole closed. You can machine sew this closed or do a quick slip stitch.
And sit back now and enjoy your lovely pillow! My total cost was only about 2$ for the fabric as I had everything else already!
Loves!
Am
(Image Source Pottery Barn)
Go ahead and stitch that fold down.Here's a how to on my pillow cover.
A forewarning. I don't measure. Or press fabrics nicely. Or use patterns.
You'll need,
Buttons (I used some vintage wooden buttons)
A nice linen fabric. I used a thicker fabric that I got on sale for 2$ a metre. It kind of looks like burlap but feels softer.
Matching thread
Pillow filling
Start off by cutting out a square. Go by what size your other throw pillows are and add 1'' for seam allowance. I made two pillows so everything is doubled.
Using this square as a template now cut another square but make it an inch or so longer. Where did that shadow come from?
On the piece that is slightly longer make a fold a few inches down.
Now take your front piece and back piece and pin together.
Stitch along the edges. Leave a small amount open at the bottom for right siding and stuffing.
Using the open pocket right side the pillow case.
Stitch your button on now.
Stuff your pillow!
Now pin the hole closed. You can machine sew this closed or do a quick slip stitch.
And sit back now and enjoy your lovely pillow! My total cost was only about 2$ for the fabric as I had everything else already!
Loves!
Am
Friday, March 25, 2011
Redecorating Love
I am currently on vacation! I decided to spruce up my home a little bit with some inexpensive redecorating. I was inspired by the comfort and clean design of Pottery Barn. I decided against using specific inspiration photos and rather just go for a comfortable clean look. We are currently renting right now so nothing major was done, just a little sprucing. I can't wait until I have a home of my own to go crazy with:)
Here's a quick before photo,
And after, inspired by the photo collages I often see in Pottery Barn living rooms. I intend on adding a little more to mine later.
Fabric love,
Next on my list is a new area rug and to replace the floor lamp!
Here's a quick DIY project that pays homage to Pottery Barn's love of letters!
Linen fabric (burlap would be divine)
I used gluegun to adhere the linen to picture frame inserts,
Use some heavy duty glue (I love Gorilla Glue) to adhere chipboard letters to the center of the frame. I bought these from the dollar store pre-painted.
Put in frame (removing glass) and ta-da !
Loves!
Am
Wednesday, March 23, 2011
Curtain Fever
Welcome to my living room! I decided to go for a change and get new curtains yesterday. I should have taken a before photo, but forgot. I bought these lovely striped linen curtains while thrift store hunting for 20$. I love them, they make the room so much brighter and let in the perfect amount of light. I have decided though that my living room is pretty much void of any color besides beige or brown. I need to bring color into my space!
I find taking photos in a small space difficult. They never turn out quite as professional as I'd like.
I also did another DIY curtain project in the bedroom where I took these sheets:
Along with the icky old curtains:
And the result was this:
I also thought I'd share my latest furniture buy from Homesense, a lovely coffee table. I love coffee tables with storage!
And that is what I am calling curtain fever around here.
Am
Wednesday, March 9, 2011
Giveaway!
Want four free soaps?
Right now I'm hosting a Giveaway through the fabulous design blog Reckless Bliss for four free soaps! To Enter click here!
Am
Monday, March 7, 2011
Almond Rebatch Soap
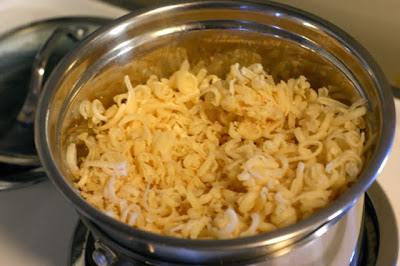
Rebatch soap is also known as French Milled Soap or Hand Milled Soap. The process of rebatching is essentially taking pre made soap (preferably handmade) and grating it like cheese. After you grate the soap you place it covered in a double boiler and wait, and wait. The soap melts down into a thick consistency which then can be put into molds. Rebatch soap is great because the soap has gone through a second curing after being rebatched which produces a very long lasting hard bar. Because no lye is handled in the process fragrances or essential oils also hold up better in the soap.
Sunday I made some Almond Rebatch Soap. I used all natural Castile Handmade Cold Process Soap and some Goat's Milk Cold Process Soap. I also used some all natural Bitter Almond Oil that smells amazing and some freshly ground almonds for a soft exfoliant. This soap turned out very natural looking to me, which I love and smells amazing.
Grated soap all ready to go. My kitchen is very dark so the pictures wont be as lovely as I'd like them to be.
2 hours later:
Crushed Almonds. Mmmm.
Into the soap mold. Will be blogging about the lovely home made wooden mold later.
24 hours later:
I love all the detail in the soap - the small bits of leftover grated soap that didn't melt down and the wonderful almond bits. This bar of soap smells divine, I'm so excited to try it out!
Am
Subscribe to:
Posts (Atom)