
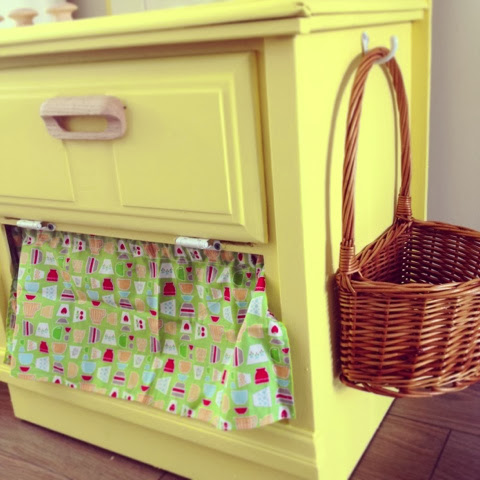
After stumbling upon so many cute DIY play kitchens on Pinterest, (seriously just punch in DIY play kitchen) I was inspired to make one for our sweet boy as a Christmas gift. He isn't at the imaginative play age yet where a kitchen would be the most beneficial, however he is really into gathering items and open drawers. He loves exploring things, especially things with cupboards and little hidden spots. Our plan was to finish before Christmas. I was so inspired that we finished much earlier. Of course I was not alone. My sweet husband did most of the hammering, drilling and cutting. I gathered the hardware and supplies needed. It was a wonderful project. I'm not going to post a tutorial as I didn't really take a bunch of step by step photographs, however if you have a question feel free to post and I will respond.
Total cost with the side table, paint, hardware, fabric and the back piece was about 70$.
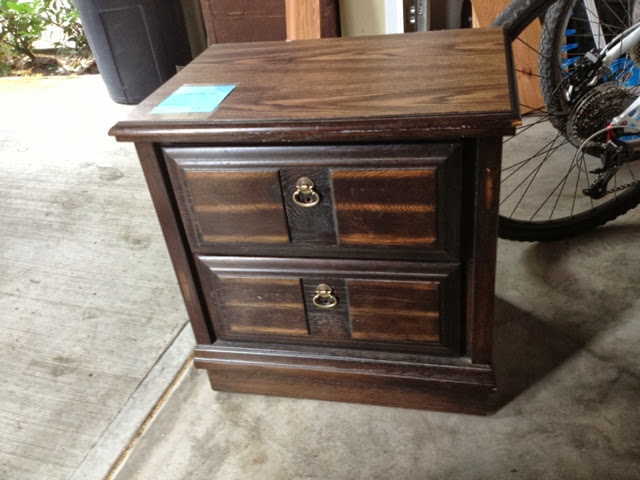
This was the before. A 15$ side table.

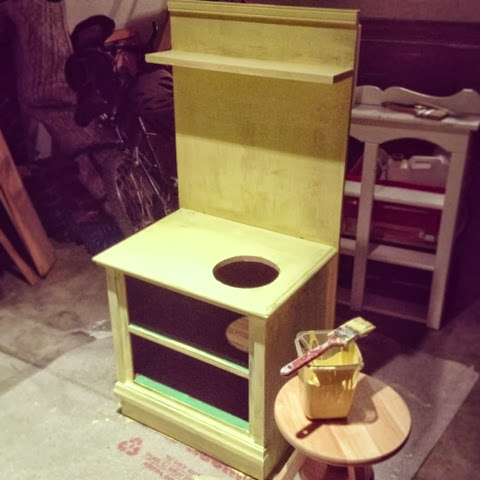
Deciding on placement.
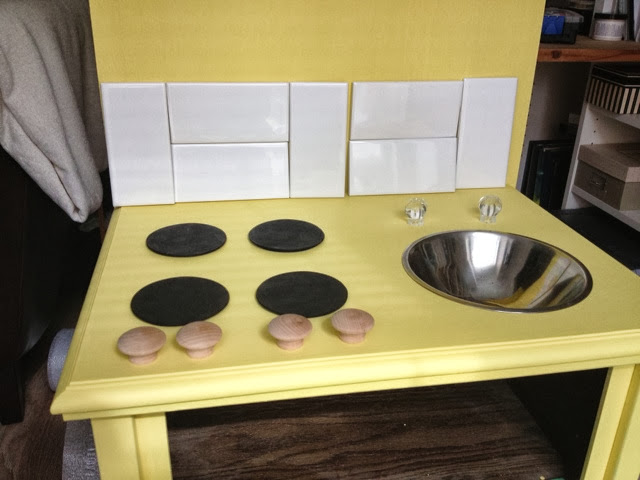
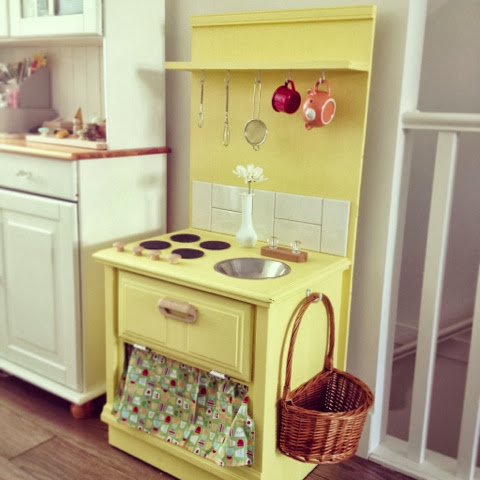
Finished! We still have to finish the taps. But that will get done eventually.

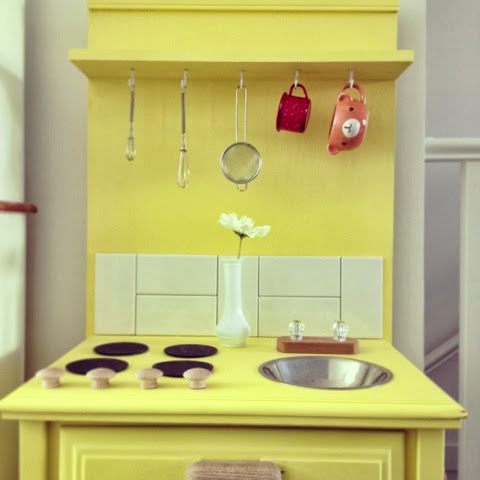
Loves!
Amber