

Happy Friday!

 I can relate to this cute little print. I feel like my hair is always a mess, I am not at all a "hair" person. I admire my coworkers that come to work with long beautiful hair or tight perfect curls. I am guilty of almost always having my hair tied up and a lot of the time I don't even bother to blow out my bangs, opting to pin them back instead.
 To check out the print click here.


 Warmest Easter wishes! I just put a 19lb turkey in the oven, I anticipate my house will be smelling wonderful in an hour or so! We are hosting Easter dinner this year and I'm looking forward to some good family and good food.
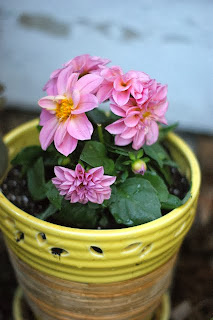
 I potted the hyacinths in preparation for when we eventually move (and buy a place!) so I can easily save them and bring them with us.
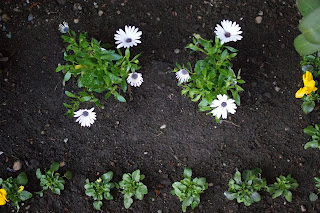
 I love the little pansies in the bottom of this picture. Pansies are so sweet and grow well here. When I was younger and living at home my dad would always let me pick out pansies to plant in the front garden. I have such fond memories of us packing up in his truck and going to the local nursery to pick out my pansies. I found a flat of pansies at my local nursery for $8, a good find!


 (Image Sources)


 I like to whisk my icing sugar prior to using it in a recipe to get out lumps.
 When you get fluffy peaks transfer mixture into another bowl. Or if you have two mixing bowls just rotate and use a new bowl.
 Drop in your cream cheese and whip until it gets a little fluffy. Add icing sugar and whip some more until combined.
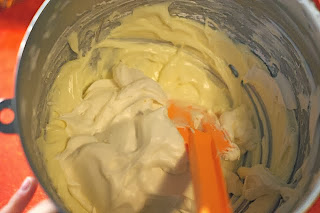
 Once your cream cheese mixture has come together (no lumps!) gently fold in your fluffy dream whip.
 Now this next part is optional, but I took a little of my beau's favorite chocolate,
 and grated a bit for on top! Chill the cheesecake for a few hours before serving. This cheesecake will be quite fluffy and not as firm as a regular cheesecake.


 I thought I would share a recipe I've been using for the last few months for homemade dish soap. This recipe is a great way to use up cold process soap that may be ugly or imperfect in some way. You can buy "ugly" handmade soap heavily discounted online (go to Etsy and search for ugly soap, you'll have lots of results at your fingertips!). You could also use pretty much any type of bar soap in this recipe provided that it is naturally based. I used a handmade bar of soap from a batch I made awhile back that traced too quickly and didn't turn out as I had planned. You want this recipe to be cost effective, as well as natural - I don't suggest you use a fancy 7$ bar of handmade soap, save that baby for a long bath!
 And grate that baby up!
 Plunk it into a pot,
 Pour the boiling water over top,
 Wait 5 minutes or so for the water to start melting the soap.
 Your soap might start lumping together, this is normal.
 Now grab your immersion blender, and blend! You can also pour all of this goodness into a blender and blend. Your mixture will froth a bit.
 Blend until all the bits are combined. Near the end of blending add in your glycerin.
 Let the mixture now sit for awhile then pour into your favorite dispensing container. I used an old plastic soap pump I already had. Depending on the soap you used you might need to dilute the mixture a bit. You also want all the froth to come down, do not fear it will! I find this soap is great for scrubbing dishes under a running tap or scrubbing dishes first then rinsing in your sink. Because this soap doesn't have oodles of chemical degreasers (it does still cut grease very well) it isn't really effective when pumped into a water filled sink of dirty dishes. My process for using this dish soap is: rinse the sink of dishes, let the water drain, scrub my dishes with a pump of soap here and there and rinse off again. A little bit of this soap really does go a long way!

