Monday, April 11, 2011

To do, or not to do.


The to do list.

Do you make to do lists? I do, I make lists for everything. Pretty much every store I'm headed to I have a list written out (I still refuse to record these lists in my Iphone, I like paper) ready to go with me. Last week was my first week back at work from Vacation. I have to admit the week was mentally and physically draining. By the weekend I'm usually somewhat on top of laundry as well as having a clean house. Last week was not so, this week however I am striving to be better!

Here is my brief to do list,
  • Clean out fridge. ASAP. This will be happening today after work. This usually means dirty dishes from uneaten leftovers. We don't have a dishwasher so there is the added fun task of even more dishes to hand wash.
  • Go through books - and donate! Yesterday I was trying to rearrange my kitchen bookshelf to make it somewhat attractive and not just a cluster of awkwardly sized cookbooks and magazines. I realized in the process that I had a ton of Country Living decorating books from the early 2000's. I don't even think I opened these books when I inherited them someone else. They are getting donated. I also have plans to go through the books in our office.
  • Clean the office. I might post some pictures just to show the evidence of how messy it is in there right now. It's almost at the point of embarrassing. Our office often becomes a dumping ground when we get busy so keeping up on the stray junk in there can be difficult.
  • List some stuff on Craigslist. I have some small pieces of furniture that didn't make the cut when I re did the bedroom, hoping to recoup some of my costs by selling them.
  • Start my garden. My garden beds still needs to be weeded, then seeded.
There are also the smaller things on my list such as,
Keep on top of laundry, dishes and cooking healthy meals.
I'm sure every day I'll think of something new to add to the list. Hopefully posting these items here will make me more accountable and I'll get everything done.

Have a lovely start to the week!

Friday, April 8, 2011

The Vintage Light

Happy Friday!
I decided on my way home from work today to stop at a local thrift store I had heard about called Tallize.

I was wandering through the furniture area when I saw this hanging light,


I am madly in love with this light. I didn't know that it was possible to be in love with a light fixture, but now I know better.


..I love that there is a piece of twine on the bottom of it holding the chain in place that turns it on,

I'm pretty sure we are going to have to rewire the lamp. The glass is also filthy inside and out, I forsee a thorough cleaning. I'm thinking that this lamp will be replacing the floor lamp in our living room now. I need ideas on how to hang it!

Oh, I forgot to tell you about the best part,

It was only $9.99! A good steal in my opinion. I love this light, it's so unique. I know for certain it has a story behind it. What home did it once hang in? How old is it really? The hardware feels old and the metal looks very aged. Right now I'm dreaming up a romantic story where this light is setting the mood in the room.

I also scooped up this lovely tray with a cork bottom from the same thrift store.

Great handles,

And this baby was only $1.49!


Hope you had a lovely week, now onto the weekend!

Wednesday, April 6, 2011

Home Made Body Butter

I love home made body products. I love buying handmade soap as well as making it. I set out recently to make Whipped Body Butter. This was my first experience within the lotion/body butter area of handmade and as always with learning new things, it was an interesting experience.

Onto some good DIY,

Ingredients,
Mango Butter 10 ounces
Sweet Almond Oil 6 ounces
Corn Starch 2 tbl
Fragrance Oil (or Essential Oil would be great) 1 tbl
I purchased all of these items at Voyageur, my local soap supply company. Check them out by clicking here.

Beautiful Mango Butter.

Sweet Almond Oil and Corn Starch.

Fragrance Oil.

Once you've got all of your ingredients measured out and ready melt the Mango Butter over a double boiler. This doesn't take long at all.

Once the butter is all melted you should have a clear liquid that looks something like this.

In a separate bowl pour in the Sweet Almond Oil. Mix in the Corn Starch and add the fragrance oil, stir it all together.

Pour the Corn Starch mixture into the melted Mango Butter.

I then took the mixture and proceeded to whip it in my KitchenAid,

...for almost an hour. Everywhere I researched said this would take 10-20 minutes. I also chilled the mixture intermittently as the whipping brought the temperature of the mixture up.

While mixing I found the spatter was really bad. I don't have a fancy spatter guard so I rigged this up out of plastic wrap,

..I feel like Martha Stewart would judge me in moments like this.

Being stubborn I then put the mixture into my blender,

..for about 40 minutes. I got some froth but it quickly died down. As a last attempt I even tried my stick blender,
...with no luck. So having killed about 3 hours of my night just trying to get this butter to whip I gave up. And poured it into these beautiful tin containers from Voyageur.

About 24 hours later the mixture has solidified. Kinda lovely in my opinion.

I made cute little labels from kraft colored paper and small twine bows.

Perhaps the lack of whipping was a happy mistake. This butter is lovely on my skin. I just scoop a small amount and warm it up with my finger tips. Almost immediately it turns into a clear oily texture but it absorbs very quickly into the skin (the Corn Starch makes it non greasy). Once the butter has soaked in my hands are silky smooth.

These little Body Butter containers make wonderful gifts, you could even make custom labels! If you know someone with really sensitive skin opt for no scent and you have a wonderful treat for their skin! I know one of these little tins is going to make its way over to a good friend of mine!

There are so many benefits from making home made body products, I can't encourage it enough. If you can try to buy local products like handmade Cold Process Soaps or even natural alternatives from the grocery store. Recently I switched my deodorant (I'm not ready to start making my own yet!) to Tom's, an all natural aluminum free alternative. Check out Tom's by clicking here. I know even with trying natural shampoos it's hard to get a good feel throughout your hair after washing. I've been using Live Clean Vegan Shampoo for several months now and I can't rave enough about them - good news is they are also available at Wal-Mart! Check them out here: http://www.live-clean.com/.

Hope you are having a great week!


P.S. I'm linking up here,

Tuesday, April 5, 2011

Blog Love

Happy Tuesday!
I had planned on putting up a post about homemade body butter, however the butter decide not to whip nicely and now I have somewhat of a salve. I have to wait for the salve to set up nicely so I think I'm going to put off that post until tomorrow.

In the mean time I thought I would share some of my blog infatuations I've been having lately.

Bluebirdbaby - a lovely blog that feeds my dream of living in the country. Oh, a gal can dream. She did a lovely post awhile back about a party she had that was Mad Men themed. Don't you just love dinner parties? I'm so nostalgic for them. I've never had a themed party before, but I hope to someday.

Beautiful, inspiring.

I loved this photo, gosh that dress.

If you've never been, drop everything and visit Bluebirdbaby.
And to see her Mad Men post click here.
You will fall in love.

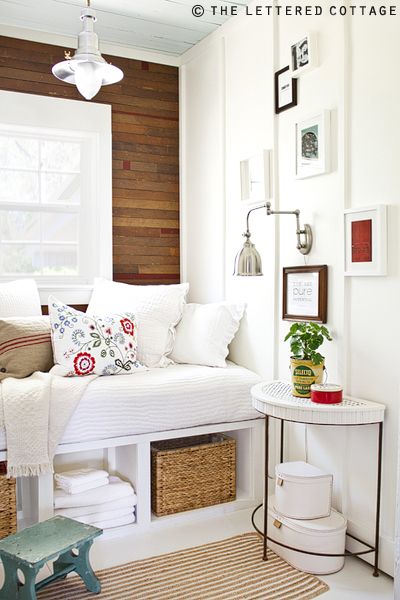
Next is an amazing post I saw over at the Lettered Cottage. This blog is lovely eye candy that only feeds my Pottery Barn obsession. This beautiful couple has a sense of style that makes my heart pitter patter. I love all of the white. This particular post is about their Reading Room Renovation. The space they created is lovely, it makes me want to curl up in there with a good book and hot cup of tea.

Seriously, go check out the post here.

Last, but not least is the lovely Nantucket house tour post from my gal friend at Reckless Bliss.

I adore her house tour posts, but this one got me weak in the knees. I love this beautiful house.
To check out her beautiful post click here.

Saturday, April 2, 2011

Blog Button!

<center><a href="http://fromtheseeds.blogspot.com/"><img src="https://blogger.googleusercontent.com/img/b/R29vZ2xl/AVvXsEgDF9g-nIn3N-BccbsuiNW_TP0BfiXHK5ukTiTtXvallHiHQB14Vbjwb44cptllyTrElM8q_dPZmKGqsYAoDBNsPoZvOEYToxR5E51AuHNEIsCoo03bEm3-cDH90gFTo4PpCEmK8fS0VQw/s1600/blogbutton.jpg"/></a></center>


It only took me about a year of having this blog, but I am finally debuting a blog button!

Stenciling Breakdown

Some of my experiences stenciling a large wall.

The before photo:

I started in the left hand corner. Why? I liked the sitting portion of stenciling.


Use good painters tape to hold your stencil in place. Rinse the stencil off in hot soapy water every so often to make sure the whole image is getting stenciled. I staggered my image to make it look more interesting.


Lastly, have time. It took me about three hours to complete this project. I does however look very fun and an interesting way to take up a large amount of space.
My beau has decided he loves the space, which of course makes me happy <3
Loves!
Am

Thursday, March 31, 2011

New Bedroom Debut

My vacation is coming to a close, but I have spent this week on something somewhat productive. I decided to re do our bedroom. We started saving up for a home of our own and from what I budgeted we were supposed to be ready this September. Unfortunately I miscalculated my beau's temporary raise into the budget and realized we wont be financially ready until January-February 2012. I'm pretty sure my redecorating obsession has stemmed from this. I'm trying to make our nest a bit more cozy to make it easier knowing we are staying where we are for so much longer.

Onto some good DIY!

Lately I have felt really inspired by Robins Egg Blue. I decided to take the plunge and paint the bedroom entirely in that color! I am a very beige person so this was a big decision for me. I'm really glad I did it while we are renting because although I am pleased with the results, I'm still not sure if it I am madly in love with it. I also decided to try my hand at stenciling. There are many other amazing DIY blogs out there where you can see lots of great examples of stenciling. Again, I am glad I tried this technique while renting, it's been great practice for me.

Here's the before pictures of my bedroom,

And the after pictures,

I moved the bed in front of the window. I love how much light white curtains bring in.


This is a close up of the little shelf, it holds my milk glass vase collection.

An awkward look of the stenciled wall, It was impossible to fit it all in one picture!

I swapped out our old nightstands for this cute cabinet. My Great Grandmother built this cabinet decades ago. I inherited it awhile back was really excited to be able to put it to good use. I think eventually I will give it a fresh coat of paint and new knobs. Another DIY project perhaps!

This is the far wall, kind of bland still! I'm thinking about what I want for the art in this space. I'm pretty sure the pictures up now are temporary. Also I apologize if the pictures look grainy or pixelly I'm not really sure why this happened. I have an amazing camera yet I'm pretty awful at taking photos of anything that isn't close up. Hopefully my photo's somewhat conveyed how cute the stenciling came out, and perhaps encourage you to give stenciling a try! I will put up a post in a few days detailing my stenciling experience.

Overall I'm happy with the space I created. I didn't expect it to turn out quite as bright, or quite as feminine (my beau hasn't yet seen the completed space, not sure if he's going to love it or hate it!). I do think sprucing up the space was a fun experience for me and a great learning lesson!

Loves!
Am